Resources are the reusable assets that power your RSX projects, things like @rsx.Mesh, @rsx.Shader and @rsx.Texture as used by @rsx.Material, @rsx.AudioClip for sound, @rsx.AnimationClip for motion, and many more. All resources inherit from the base @rsx.Resource class, which handles serialization, UUIDs for unique identification, and lifecycle hooks (like onInitialize or onSerialize) for custom behavior.
Apart from @rsx.BuiltInResource you can also implement your own @rsx.Resource by subclassing from it and implementing all behaviors. Without any additional work, your custom resources can support versioning and serialization.
Unlike @rsx.SceneObject (which exist in a specific @rsx.Scene hierarchy), resources live in your Project's Library. The project library is a centralized, cloud-synced collection accessible across all scenes in your project. This makes them easy to share, version, and reference via handles (@rsx.ResourceHandle) for safe, persistent linking.
In this guide, you'll learn how to import external files and assets into resources, browse and organize them in the editor, and edit common types like meshes and materials. The workflows are transitive and apply to all resources within RSX.
¶ Browsing Resources using the Library window
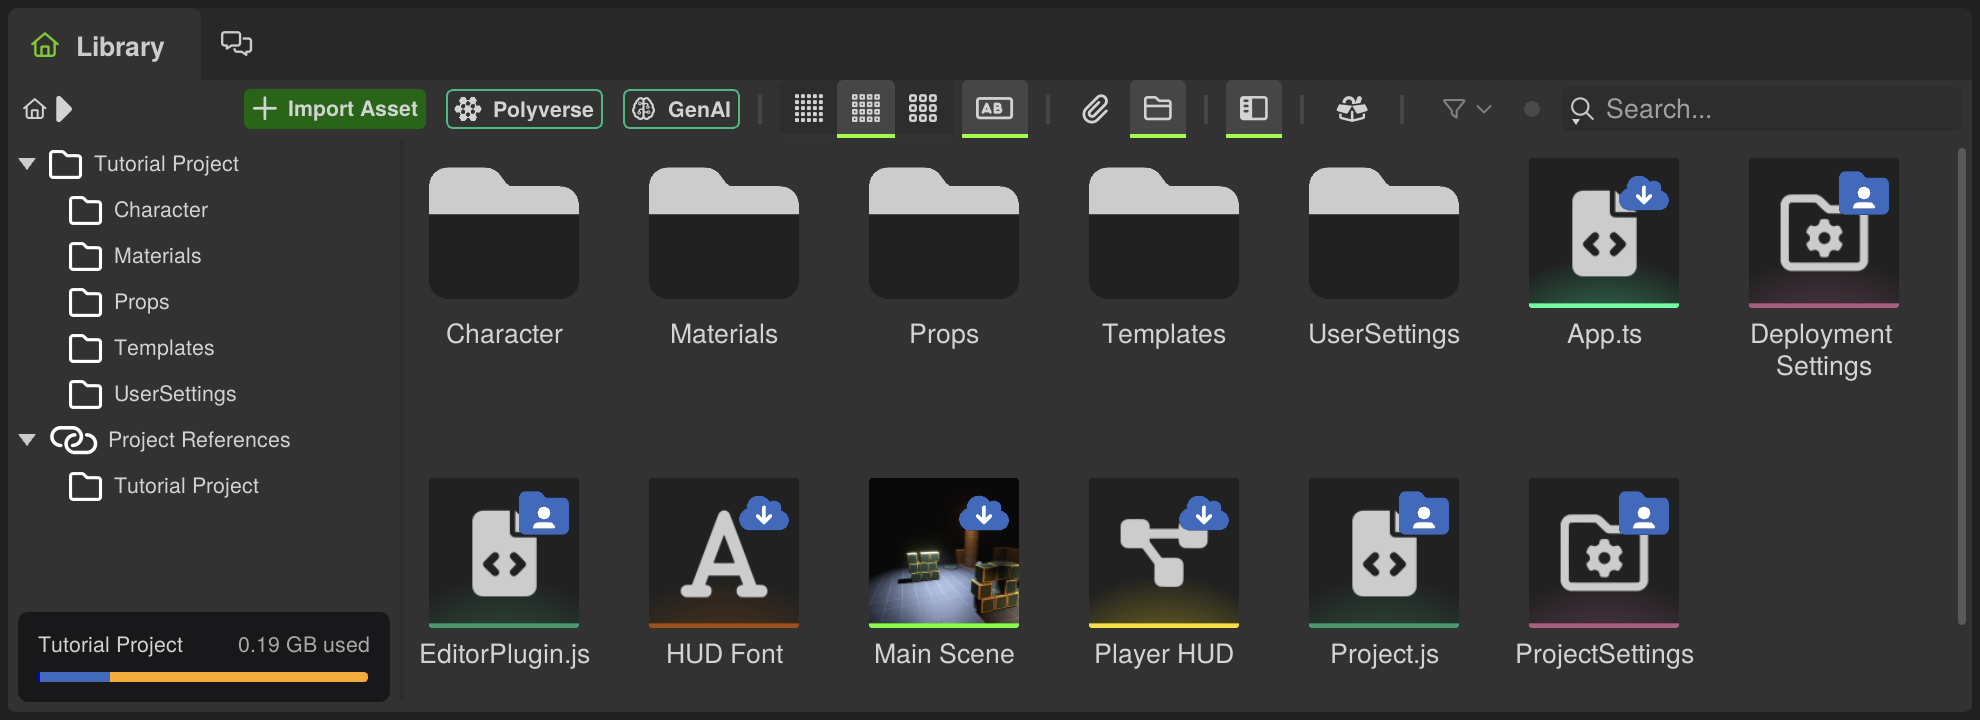
- Open the Library window (bottom-left by default; if hidden, go to Window → Library).
- You'll see an file-explorer style view of your project, with a tree-view on the left that contains two root-nodes:
- Name of the currenty loaded Project → Files stored on your machine, sync via RSX Cloud collaboration and versioning.
- Project References → External RSX packages and projects used by the current project.
- The content view can be customized to show large or small icons, or hide the names of resources and only browse by icon preview.
- Filter by type using the search bar (e.g., "mesh" or ".fbx") or the type dropdown (Mesh, Texture, Material, etc.).
- Right-click an asset for options such as Duplicate, Rename, Delete and other resource specific actions.
- Note: Developers can easily extend this systems and add implement their own resource specific actions!
Resources are automatically organized by folders you create (Right Mouse → New Folder). Drag the icons into folders to reorganize your library.
¶ Importing Resources
RSX supports drag-and-drop imports from your file system or direct uploads. It uses built-in tools like InstaLOD for file import and optimization.
¶ Step-by-Step Import
- In the Library window, navigate to the folder where you want the resource (e.g., "Models" or "Textures").
- Drag files from your desktop/explorer directly into the Library window. Once a file-drag enters the RSX window, it will highlight window that support the drag operation.
- Supported formats:
- Meshes: FBX, USD, OBJ, GLTF/GLB, STL, CAD (STEP, IGES via InstaLOD).
- Textures: PNG, JPEG, HDR, TIFF, EXR, DDS.
- Audio: WAV, FLAC, OGG.
- Animations: FBX, USD, OBJ, GLTF/GLB.
- Shapes: SVG
- Fonts: OTF, TTF
- To get a quick list of all supported formats visit Compatible Asset Formats.
- Supported formats:
- Once the import beings, RSX will perform a "Peek"-operation to understand the file contents. Once the operation has completed, the import dialog will update with file-specific options.
- By default, RSX will try to make importing assets as easy as possible by recommending helpful default options such as enabling texture compression or setting the right content type.
- It is worth taking the time to get familiar with fundemantal convetions for 3D data and rendering such as colorspaces and content types. Taking the wrong choice, can lead to incorrect rendering results.
- Click Import, the file converts to an RSX resource (e.g., FBX → @rsx.Mesh with submeshes, materials and sections, prefab template and skeleton if animated).
- The resource is now imported asynchronously in the background and will appear in the Library window with a UUID for referencing.
For bulk imports, simply drag multiple files at once onto the Library window.
Importing CAD files requires Teams plans and works locally when using the native app. In the browser, the import will be automatically processed by the server, without additional cost.

¶ Editing Resources
Once imported, double-click a resource in the Asset Browser to open it in the appropriate editor. Changes save automatically (or manually via Ctrl + S), and you can Revert via the resource's context menu.
¶ Best Practices
- Organization: Use folders and naming conventions (e.g., "Textures/T_Rock_BaseColor.png").
- Performance: Only enable CPU caching (
MeshUsage::CPUCached) when the data is required persistently, even without CPU caching you can easily perform an asynchronous read-back of the @rsx.Mesh or @rsx.Texture data.
¶ Next Steps
🎉 Congratulations! You are now familiar with @rsx.Resource specific workflows in RSX. Next, we're going to....