This introduction to the RSX Editor interface describes the most common buttons, panels, docks, and toolbars you’ll interact with on a daily basis. This page will help you understand what they do and how to use them effectively. While the overall layout is consistent across desktop and browser versions, it’s highly customizable: you can dock, undock, resize, hide, or rearrange almost everything, so it’s worth spending a few minutes familiarizing yourself with the default setup, especially if you’re new to RSX.
When you first launch RSX (either the desktop client or directly in the browser at editor.rsxengine.com), the editor opens straight into the Scene Key Window upon loading your project. This is the heart of RSX and the place where you’ll spend the vast majority of your time building scenes, environments, interactions, and entire experiences. Unlike traditional engines that separate “level editor,” “asset editor,” etc., RSX unifies everything into one fluid workspace: you can edit scenes, materials, logic, animations, and AI all in the same workspace, often simultaneously.
Once your project loads, you’ll see the default layout (shown below using the “First Person Camera” template that was created in the previous chapter of our guide; templates like Third-Person or Car Configurator will populate the scene with starter content).
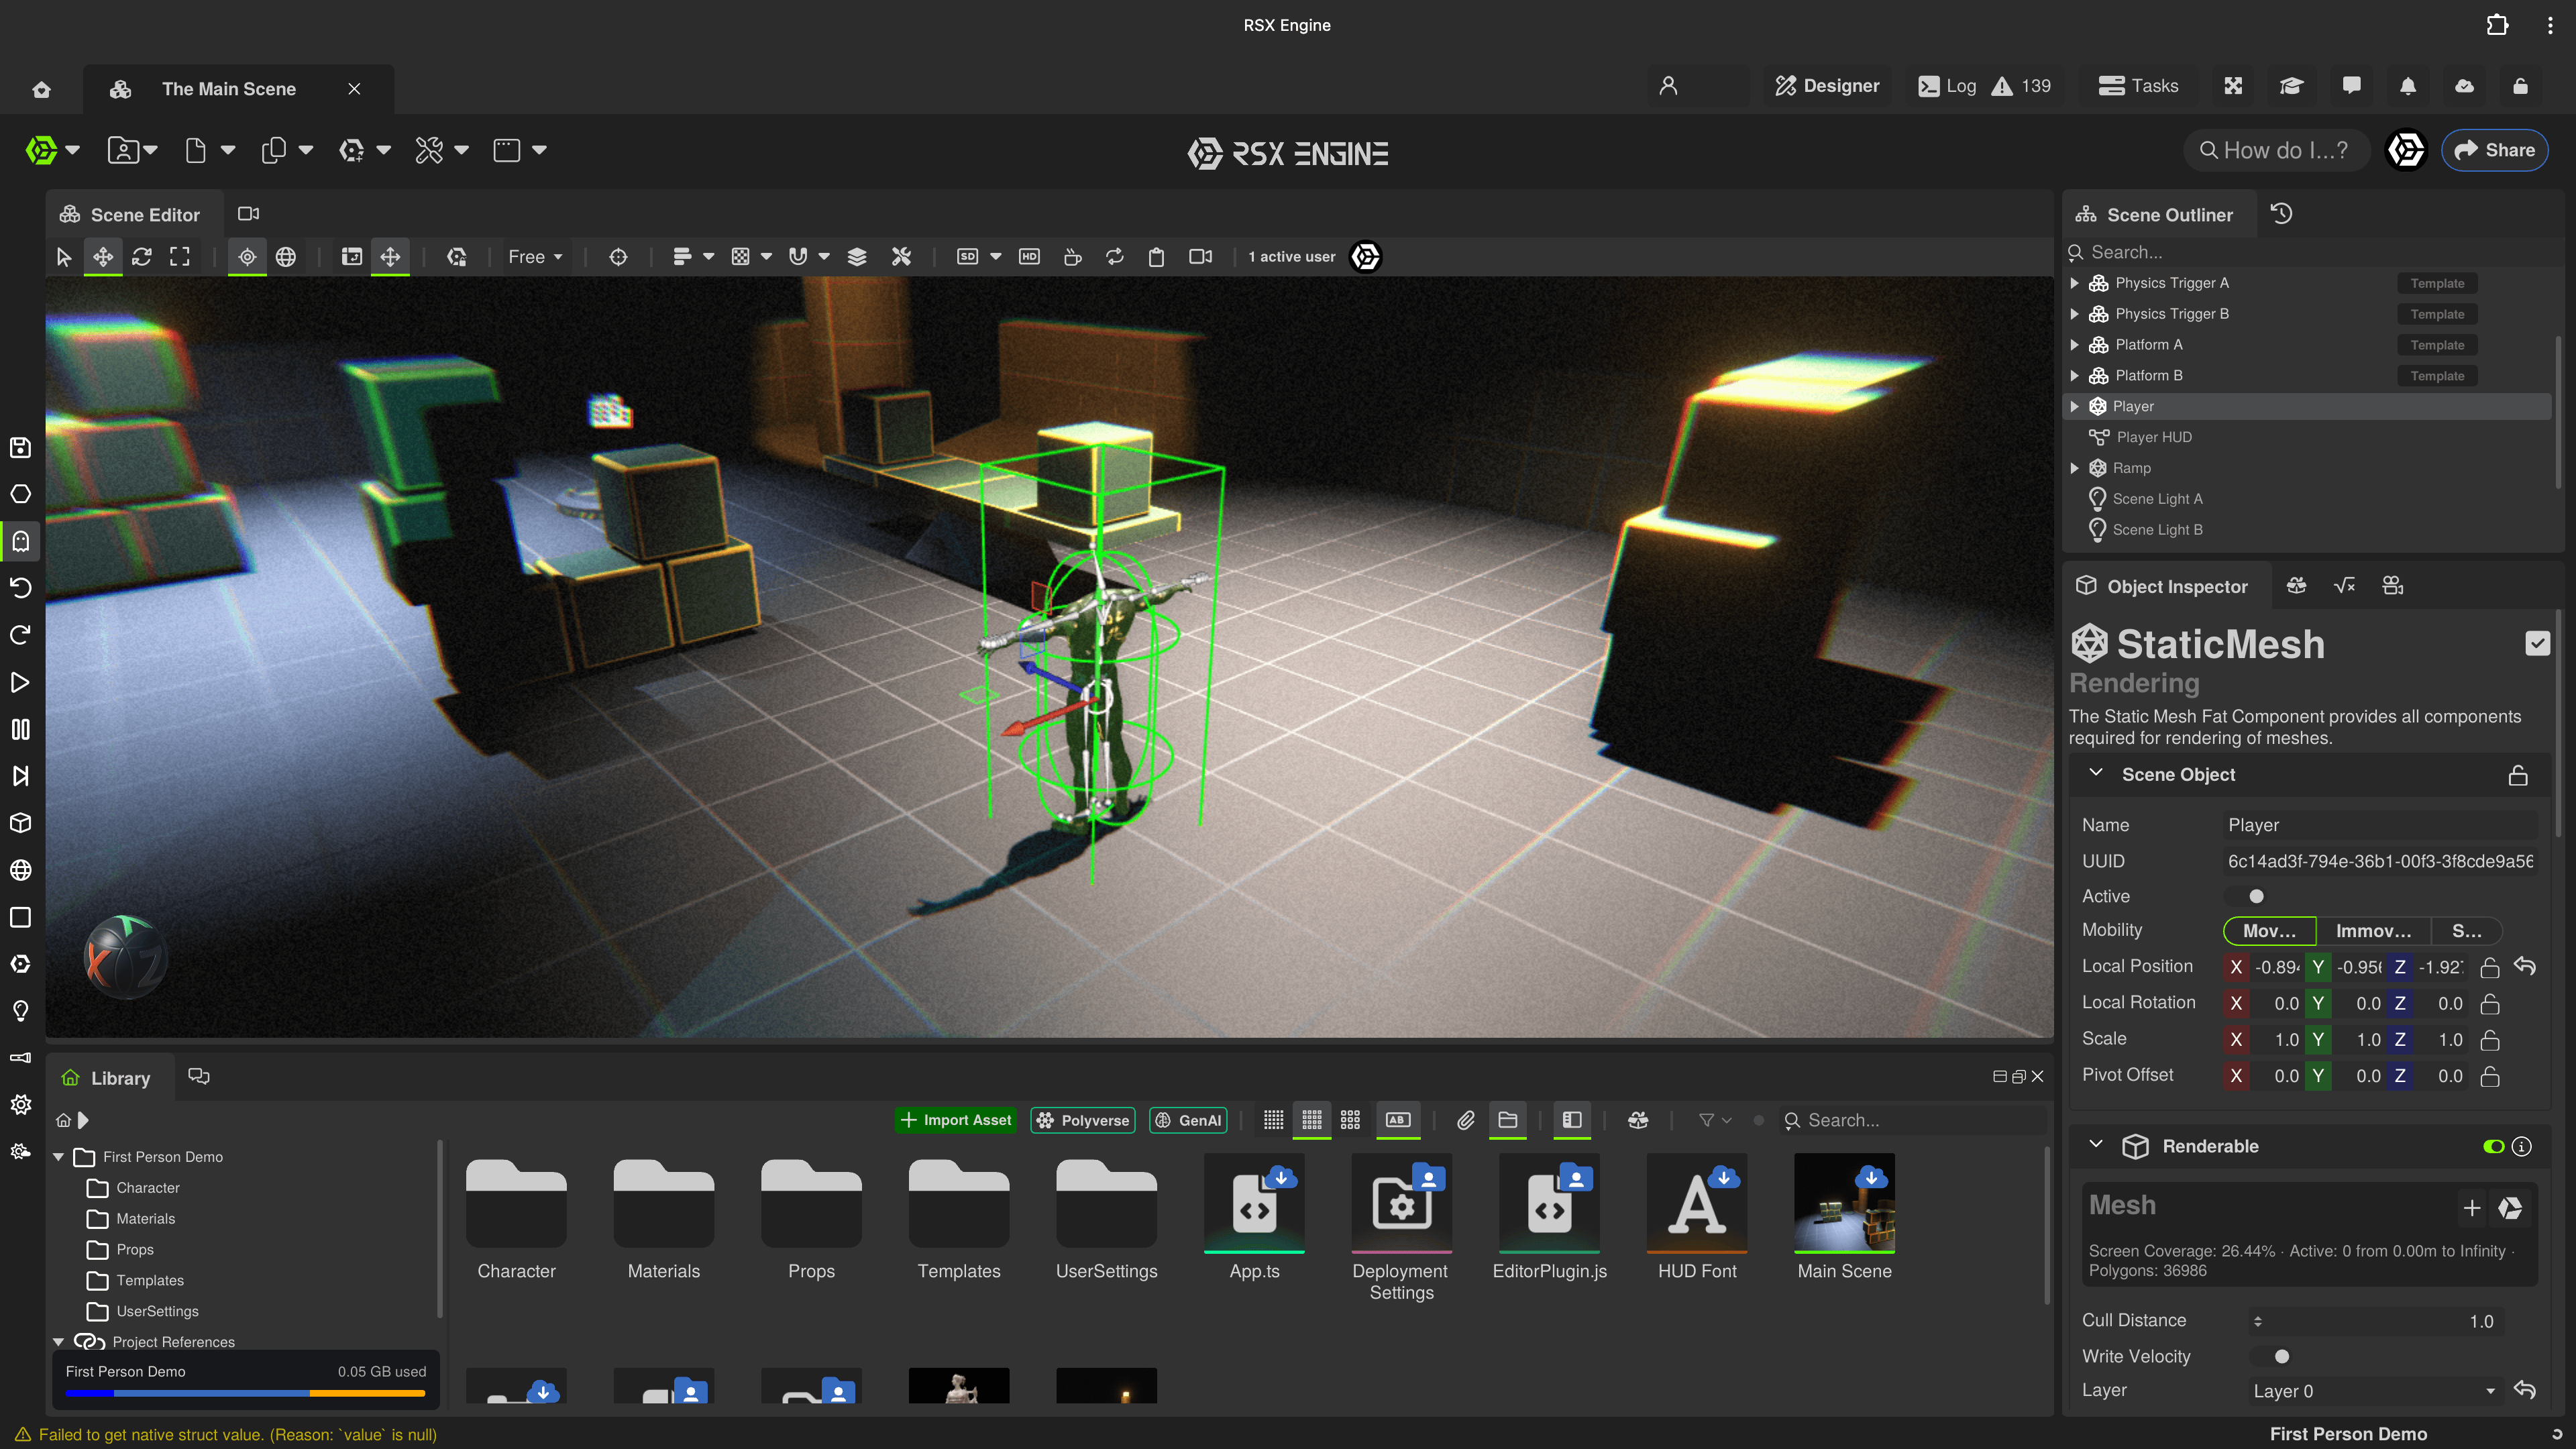
¶ Default RSX Editor Layout Overview
Typical default layout:
- Main Menu (top) → Quick access to menu actions such as Save, Undo/Redo, Object/Component creation, Developer tools, Application Deployments and project/user settings.
- Keywindow Toolbar (left edge) → Quick access to Save, Undo/Redo, Play ▶ Play / ■ Stop / ⏸ Pause, Primitive/Light creation.
- Scene Editor (center, usually the largest area) → The 3D (or 2D) real-time view of your current scene. Supports perspective, orthographic, multiple split-viewports, and instant in-editor play mode.
- Main Camera (center, docked behind Scene Editor) → Renders the camera currently marked as Main Camera. The Main Camera is what is used to render the world when the project is in play mode, or the project has been deployed. The main camera is typically what the end-user of your project would use to view the world.
- Outliner (top-right) → Hierarchical list of all objects in the scene. Supports searching, filtering, locking, and multi-selection as well as context specific actions (RMB click)
- Undo History (top-right, docked behind Outliner) → Access to the undo/redo history of recently taken actions in the Scene Editor.
- Library (bottom-left) → Your project files, imported models, textures, materials, Carbon graphs, and cloud library assets. Drag-and-drop directly into the viewport or onto the Scene Object Inspector.
- Resource Discussion (bottom-left, docked behind Library) → A persistent chat with your teams contextually localized to the currently open scene.
- Scene Object Inspector (bottom-right) → Context-sensitive inspector showing components, transform, materials, Carbon behaviors, etc., for whatever is currently selected.
- Resource Inspector (bottom-right, docked behind Scene Object Inspector) → Context-sensitive inspector showing information for the Resource currently selected in the library.
- Viewport Settings (bottom-right, docked behind Scene Object Inspector) → Provides access to the camera used for the Scene Editor such as project type (perspective, orthographic), navigation speed and post-processing/render settings.
- CVars (bottom-right, docked behind Scene Object Inspector) → Quick access to console variables (CVars) with options to search and edit values.
Everything is fully dockable and tabbable. You can tear off any panel to float it, stack tabs, or even move panels to a second monitor. To reset to factory default, go to Window → Reset to Layout. To prevent editing of your layout, enable the UI Lock by pressing the lock button in the top-right corner of the Main Menu.
RSX was designed from the ground up for modern collaborative and web-first workflows, so the interface feels clean, responsive, and instantly familiar.
Take a moment to explore the Window menu to show/hide any panel you need (e.g., Polyverse, Log, Resource Preview, Profiler, etc.).
¶ Main Menu
The image below shows the RSX Main Menu bar. The Main Menu is visible on every "Key Window" type and can easily be extended by developers with custom menu items.

| Number | Button | Description |
|---|---|---|
| 1 | RSX | About screen and user account-specific options |
| 2 | Project | Unload the current project, customize user and project specific options and to deploy the project as an executable on the web or as native application bundle |
| 3 | File | Access to file-specific actions such as creating a new scene, new resource or new folder, settings the project preview image or saving all current changes |
| 4 | Edit | Undo/Redo and actions to edit the current object such as copy/paste and object duplication |
| 5 | Object Creation | Quick action to create new objects and components such as a Renderable, Particle System or AI Agent. |
| 6 | Develop | Quick actions to recompile the scene, change the active gizmo, starting/stopping the simulation or to access developer features |
| 7 | Window | Quick actions to spawn or raise windows or to reset the layout |
| 8 | How do I...? | Quick action to query the RSX Engine knowledge base with questions such as "How do I add a component?" |
| 9 | Team | Shows all members of your team that have access to the current project. |
| 10 | Share | Quickly invite colleagues and friends to access the project and edit collaboratively |
¶ RSX Engine's Viewport and Scene Editing
The Scene Editor window displays the scene that is currently loaded to be viewed or edited. Any changes made to the scene will be automatically saved and synchronized with your team in real-time.
The Scene Editor will allow you to build anything, whether it is an immersive gaming experience or a next-level product configurator. When your team members have the same project open, you can see their cameras and actions right there in the viewport. Additionally, the Scene Editing Toolbar will display all members that are currently working in the scene.
The image below shows the Scene Editor window with the player character of the "First Person Camera" sample selected.
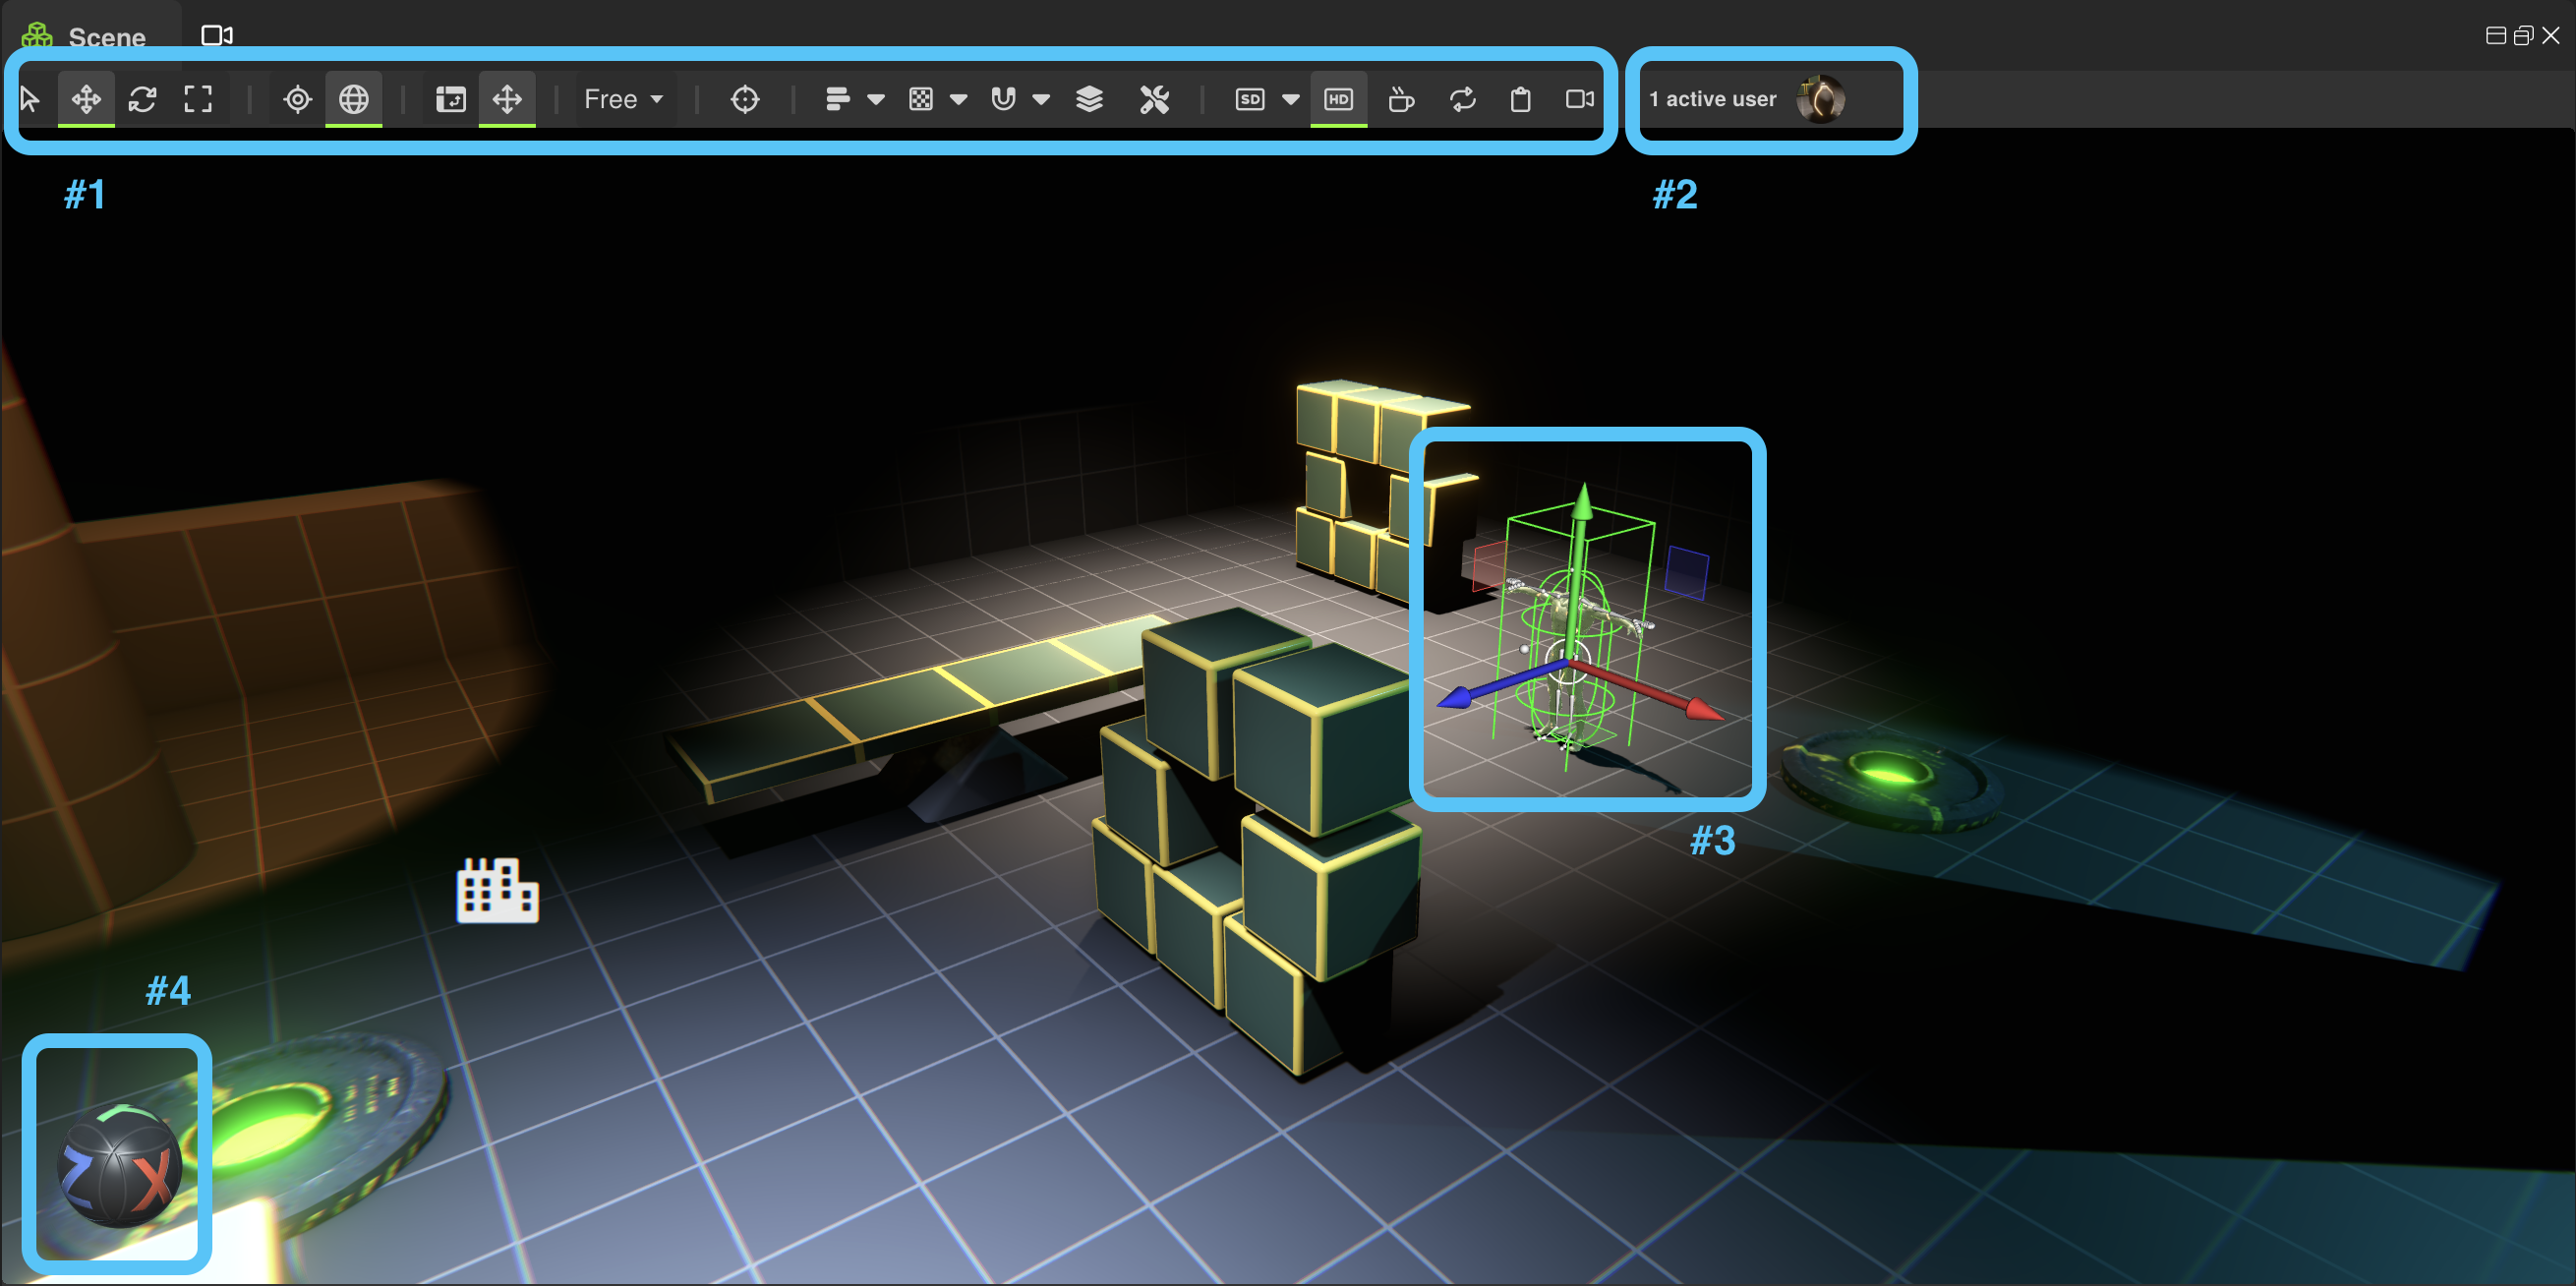
| Number | Name | Description |
|---|---|---|
| 1 | Scene Editor Toolbar | Provides quick access to changing the active gizmo, camera aspect ratio, focusing the object and others |
| 2 | Team Activity | Displays the profile picture of team members that are currently editing the scene. Hover over a profile picture to show the user-card popup. |
| 3 | Scene Gizmo | Displays the currently selected object to edit the position, rotation or scale. Use the W/E/R keys to toggle between Translation/Rotation/Scale or use the gizmo buttons on the left of the Scene Editor Toolbar. |
| 4 | View Sphere | Drag the viewsphere to rotate around the focused object, or click on the satellite buttons to align the camera with a world axis. Press F to set the focus on the currently selected object, or press the target button in the menu bar. The camera will automatically frame the scene selection. |
¶ Interacting with the Scene
To look around in the currently loaded scene with your Scene Editor Camera simply Right Mouse Click and Mouse Drag.
To move your camera,Right Mouse Click and hold:
- W to move forward
- S to move back
- A to move left
- D to move right
- E to move up
- Q to move down
You can hold Shift to accelerate the camera. To dolly the camera Mouse Wheel up or down, to move forward or back.
🚀 Take a minute to get familiar with the basic navigation in the RSX Scene Editor.
You can control the mouse sensitivity and invert look up/down your user specific settings Project → User Settings... → Scene Editing
Next, click on one of the boxes in the sample project.
| Unselected | Selected |
|---|---|
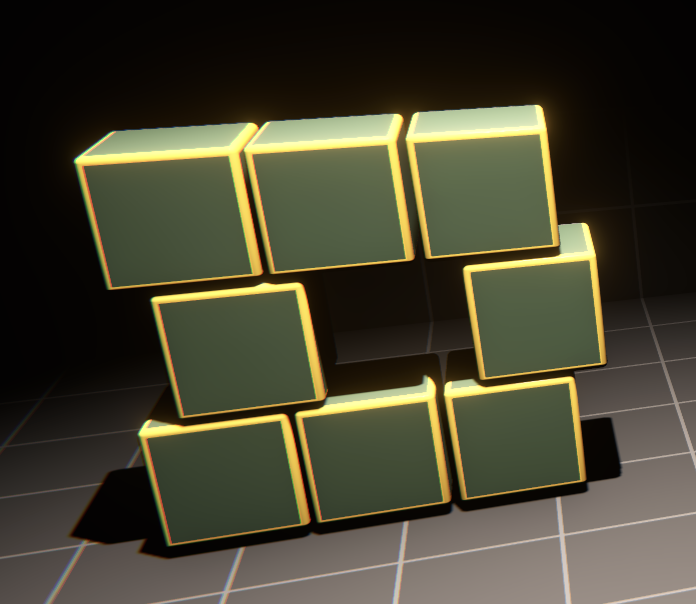 |
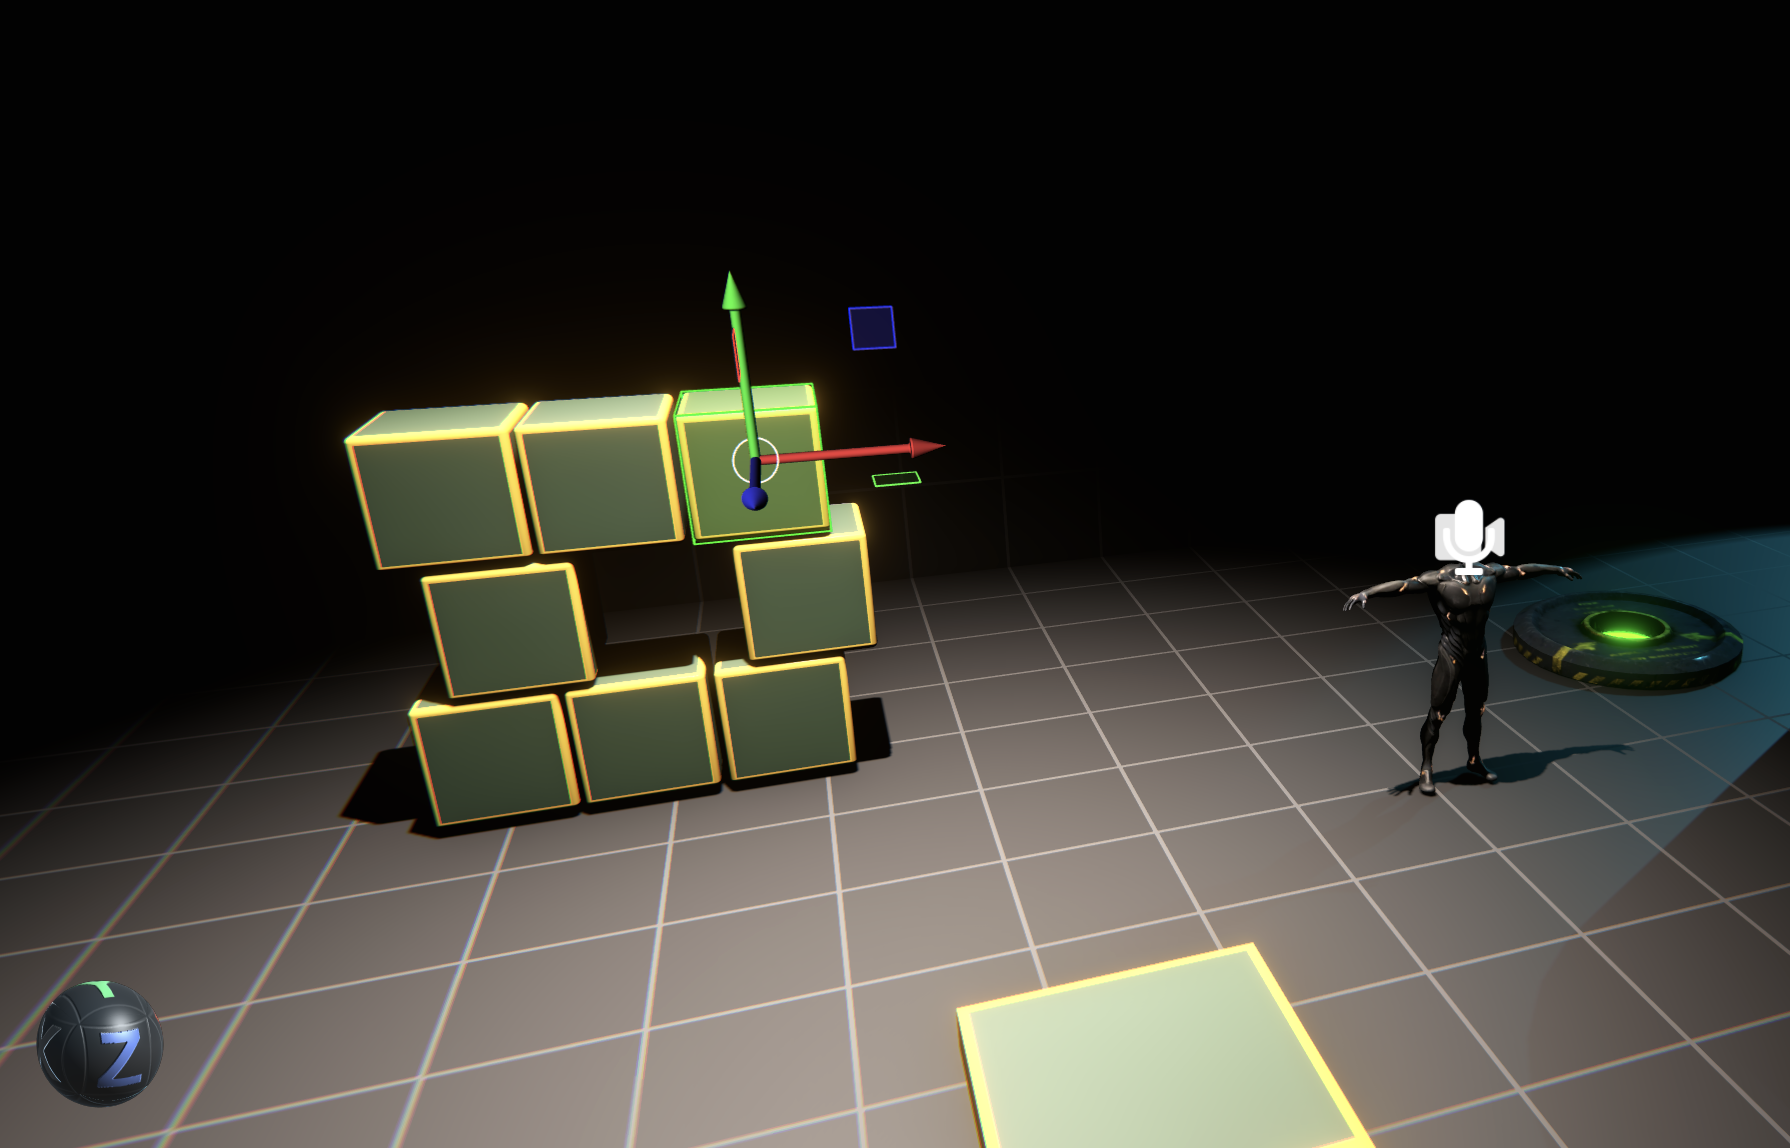 |
| Select one of these boxes. | After the selection, the gizmo automatically moves to the selected object. Now press F to focus the selection and frame the camera. |
Now that you have an object selected and focused, you can use the View Sphere #4 to orbit around it seamlessly by clicking and dragging the View Sphere.
Alternatively, you can press Alt or Option + Left Click Mouse and Mouse Drag in the Scene Editor window to orbit.
¶ Selecting multiple Objects
You can select multiple objects in the viewport by holding down Shift and clicking on additional objects. You can also box-select multiple object by holding down Shift + Left Click Mouse and Mouse Drag in the Scene Editor window.
To see the view of the current Main Camera click the tab-behind the Scene Editor. Note that the Main Camera is not movable unless its position is changed using the gizmo.
You can see both the Scene Editor Camera and the Main Camera side-by-side if you right-click on the Scene Editor tab and press Split to Left from the menu. Try it!
🎉 Congratulations! You are now familiar with the basic navigational controls of the RSX Engine Scene Editor window.
¶ Understanding the Scene Hierachy with the Outliner Window
Selecting objects in RSX Engine via the Scene Editor window is quick and intutitive. However, for large scenes it can be helpful to locate a specific object and navigate it by pressing F to focus.
The Outliner Window is the tool that provides you with a comprehensive view of the @rsx.SceneObject hierarchy.
By default, all objects are lexicographically sorted (from A to Z) but you can also search by name using the search box add the top. Clicking the filter button reveals a type filter, that quickly lets you find all Scene Objects with a @rsx.Camera or @rsx.Renderable component in your scene.
The selection is synchronized with the selection in the Scene Editor window.
Double-Clicking a tree element will automatically raise the Scene Object Inspector window.
You can Drag and Drop items to group object (or 'Parent' one object to another). If the 'Parent' moves or rotates, all 'Children' will move or rotate with it.
¶ The World Object 🌎
At the bottom of the Outliner window, there is a special object called the @rsx.WorldObject. The World Object controls global settings that apply to the @rsx.Scene itself, such as:
- Choosing which @rsx.Camera is the current Main Camera.
- The @rsx.VolumetricLightingSceneSettings that control the volumetric lighting in your scene (You need to enable volumetric lighting in the post-processing settings to render it!)
- The settings used by the Physics simulation of your scene.
- The resource and settings for the AI agents that traverse your scene.
¶ Your Project's Asset Library: The Library Window
The Library Window in the bottom-left corner of the Scene Key Window contains all of the assets available in your project. Similar to scene editing, assets in your project are automatically versioned and synchronized with all members of your team.
The Library Window works just like the File Explorer (or Finder on MacOS), you can browse through folders, rename objects, change the preview size or delete objects. The left half of the window shows a tree view, to quickly navigate through your project's assets. The right half of the window shows the contents of the currently selected folder. You can also browse through folders by double-clicking on a folder preview.
To add spawn (or instance) a @rsx.Mesh or @rsx.Template in your scene, simply drag the resource from the Library Window into the Scene Editor as seen below.
¶ Adding, or Importing new Assets to the Project
Adding new assets (or @rsx.Resource as we call them) is as easy as dragging one into your scene. Simply drag a file from your Desktop onto the Library window - this work the same, whether you work on the Web or using the Native app.
RSX supports all major file formats when it comes to 3D models, texture and audio. Try dragging in an FBX into your library. You can download the following file from Polyverse to test the workflow. Click the green Polyverse button to visit the asset page, then click the download button bellow the asset viewer.
¶ Introducing: Polyverse
However, there is a better way than manually storing files locally and importing them to RSX Engine. It's called Polyverse!
Polyverse is a Digital Asset Management system, developed by the folks behind RSX Engine. It enables you to collaboratively store and manage all of the content you need to build 3D experiences: 3D Models, Materials, Images, Audio and Video. It also provides you with the ability to perform powerful data-processing from anywhere on the planet.
Anything you store Polyverse is always available - whether in RSX Engine or other applications such as Blender or Maya.
Even better, you will have access to all publicly available assets in Polyverse, so you get free access to thousands of 3D models and materials to kick start your creative process.
Polyverse fully integrated into RSX Engine and easily available by clicking the Polyverse Button on the Library Toolbar. Alternatively, you can also raise the Polyverse Window by selection Window → Polyverse from the Main Menu.
In the video below, you can see the process of opening Polyverse from the Library Window and importing an asset into RSX.
¶ Next Steps
🎉 You are now familiar with the primary user-interface of the RSX Engine Editor. You can navigate the scene, select Scene Objects and add new assets to your scene. In the next chapter, we're going to get familiar with editing a @rsx.SceneObject using the Scene Object Inspector.