Deploying your RSX Engine project turns it into a standalone application that runs independently of the RSX Editor, perfect for sharing interactive experiences, simulations, games, or visualizations with end users. Whether targeting desktop, web, or other platforms, RSX makes the process easy and approachable through the intuitive Deployment Window. This guide walks you through selecting platforms, configuring options, gathering dependencies, and building your app.
RSX supports a variety of deployment targets, including Desktop, Mobile, VR/AR, Consoles and Web (browser-based via WebGPU), and cloud-hosted options like Polyverse for seamless web distribution. Deployments can be interactive (with user controls) or passive (e.g., automated camera fly-throughs via AnimationClips).
🤓
During Early Access, the supported platforms include Windows, MacOS and Web. More platform targets will be available soon!
¶ Deploying your Application
-
Ensure your project is saved and cloud-synced.
-
Open the Deployment Window via the Main Menu: Project → Deploy.
-
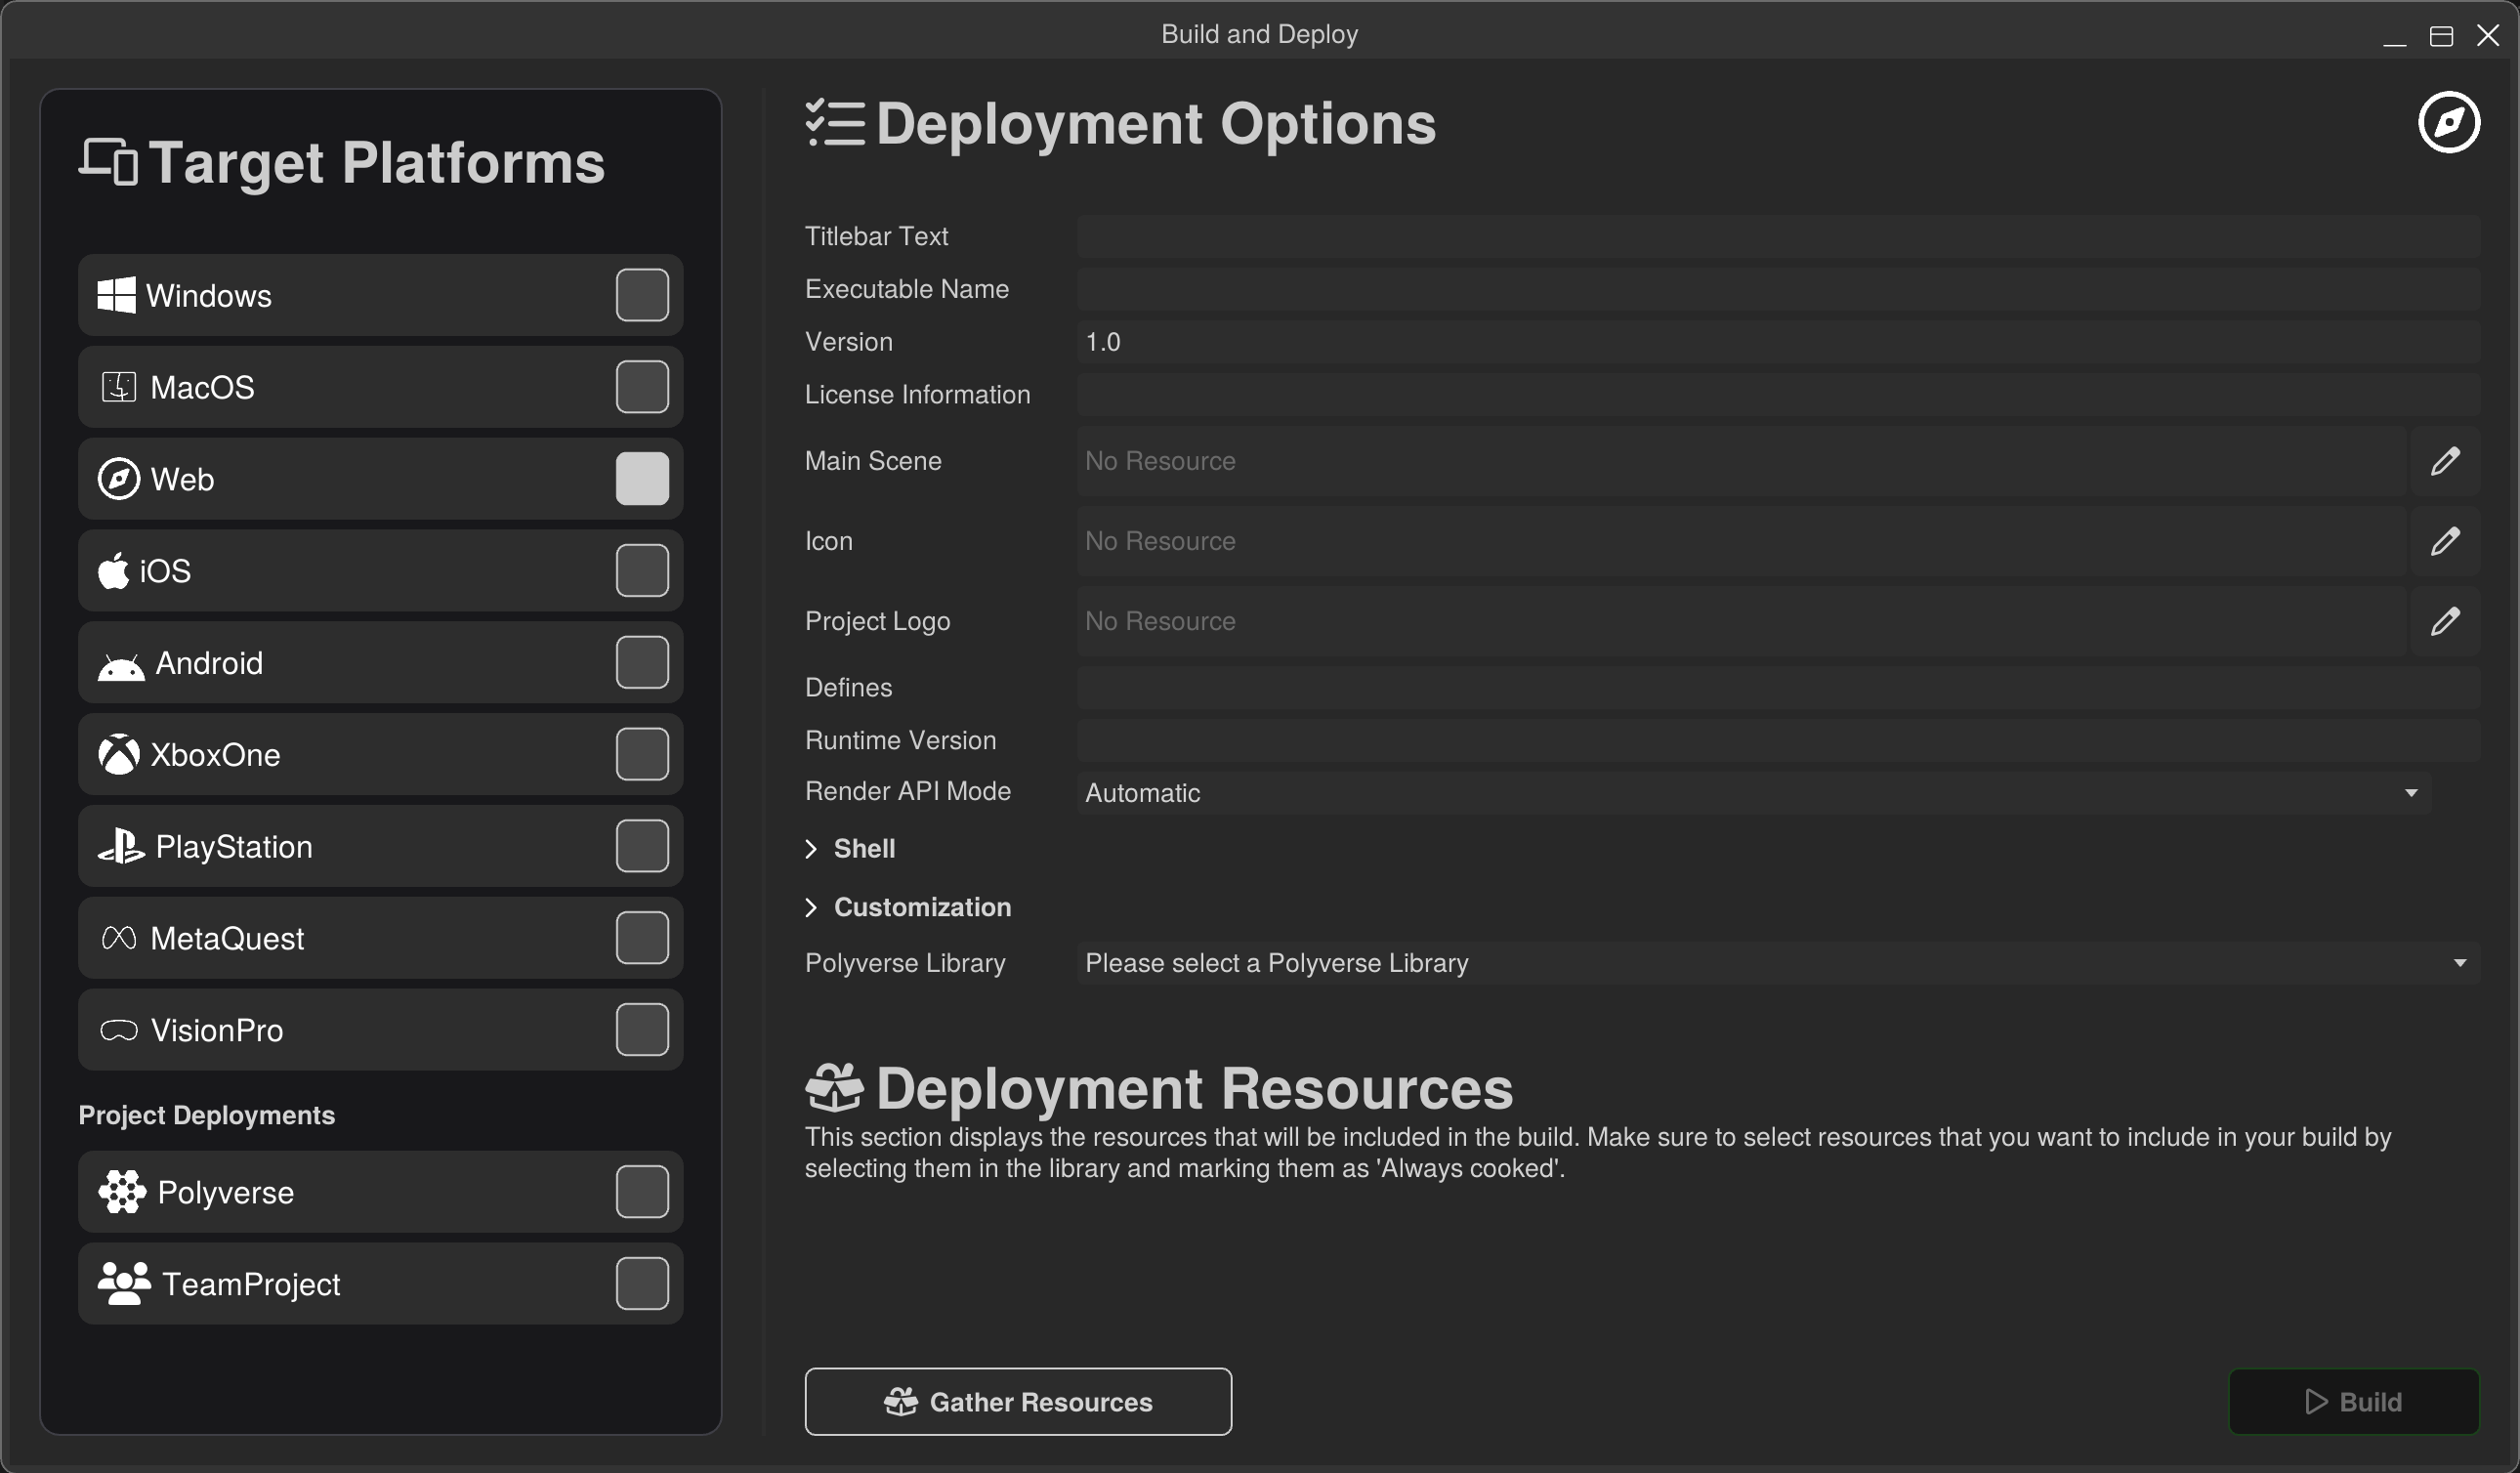
On the left side of the Deployment Window, browse the list of available platforms:
- Desktop: Windows (EXE), macOS (APP bundle).
- Web: Browser (WebGPU and WebGL).
- Others may appear depending on your RSX version (e.g., Linux beta, XR for Quest/Vision Pro).
-
Click a platform to select it. The right side of the window updates with platform-specific Deployment Options. Each platform can save it's own settings in the Deployment Resource that is created upon successful deployment.
¶ Configuring Deployment Options
The platform-specific deployment options enable you to control what data is deployed as application and also customize the apperance of the deployed application.
Key settings include:
- Executable Name: The name of the output file or app (e.g., "MySimulation.exe" for Windows). Defaults to your project name.
- Version: The version of your deployed application.
- Main Scene: The entry point scene loaded on startup. Select from your project's scenes via the dropdown.
- For interactive apps: Choose a scene with controller components (e.g., a Carbon Graph for user input).
- For passive experiences: Pick a scene with AnimationClip resources driving camera/object movements, no user input is needed and the application will auto-play.
- For web deployments:
- Polyverse Library: This is the Polyverse library that host your application. Teams plans can also deploy as a direct link with a standalone page that can run outside of Polyverse!
There are more settings to configure on the Deployment Window, but these should get you started with your deployment!
¶ Gathering Dependencies
To successfuly deploy your application, RSX Engine must determine which resources are needed to run the application outside of the editor environemnt.
RSX automatically identifies what's needed for your Main Scene, but you can include additional Resources from your Library if needed.
-
Click Gather Resources at the bottom of the window.
- RSX scans: Scenes, resources (meshes, textures, materials), components, and linked assets.
- A list appears showing included files (with sizes for optimization insights).
-
Add More Resources (Optional):
- In the Library window: Select a resource (e.g., an extra scene or audio clip).
- Open the Resource Inspector to the Deployment Setttings panel.
- Enable the Always Included to include the Resource even when not directly referenced by the Main Scene.
- A new option appears Deployment Platforms which defaults to
All. Select the target platforms that should include the Resource. - The now included Resource will be part of the deep packaging analysis which means, that similar to the Main Scene all of its dependencies will also be automatically included!
- Open the Deployment Window again, and press Gather Resources. The list updates to include your manually included resource as well as its dependencies.
-
Review your Deployment:
- Go over the resource list at the bottom and make sure you do not include unnecessary.
- This is a helpful step to further reduce the data size of the project by using techniques such as texture compression, or InstaLOD to reduce mesh sizes.
¶ Building and Running Your Application
Once RSX has gathered the dependencies needed to run the application, it can proceed to building it.
- The Build button at the bottom should now be enabled.
- Click Build to build the application.
- Build time varies (seconds for small web apps, minutes for complex desktops). The progress is displayed in the popup window that appears during the assembly.
- Run the Application:
- For Desktop: Navigate to the output folder and run the application!
- For Web: Open the generated page by clicking the Open in new Tab button.
- Test your application: Play the app, check for missing resources or incorrect behavior of your logic
¶ Best Practices and Troubleshooting
- Commit your Code: In order for your code changes to be available, make sure to Commit your code from Developer Mode.
- Optimization: Profile in-editor first; but test in your deployed application!
- Common Issues:
- Missing resources such as audio or meshes? Make sure to include missing Resources and rebuild.
- Web errors? Ensure the browser fully supports WebGPU, or allow falling back to WebGL. Currently, we recommend using either Chrome or Edge.
- Polyverse asset cannot be opened? Verify that the user has permissions to access the library, or enable public access.
¶ Next Steps
You're now able to create a project and deploy it! This is the complete life-cycle of an application. As you learned in this guide, building and deploying content with RSX is fast and flexible, empowering you to ship polished experiences effortlessly. Your first build is just clicks away!
- Browse the RSX Code References
- Browse the rest of the wiki!
- Join our Discord server and let us know about your experience during Early Access!